Setting Form
Before you can begin using the Inventory Transactions Integrator, you must complete the Settings Form. The values you configure here determine how transactions are processed by Oracle ERP Cloud, and they drive the layout that is generated for your Inventory Transactions sheet. Completing this form correctly is a prerequisite for all Create, Update, Delete, and Download operations.
Step 1: Open the Settings Form
Click the Settings icon in the More4apps ribbon to launch the Settings Form. From the list of available Integrators, select Inventory Transactions and click Select.
Step 2: Configure the Processing Option
Select a Process Option from the list of values. This setting controls how Oracle ERP Cloud processes the uploaded inventory transactions. Two options are available:
Process Option |
Description |
Online Processing |
Transactions are submitted directly to Oracle and processed immediately upon upload. Results and any errors are returned in real time. Recommended when processing smaller volumes of transactions and immediate confirmation is required. |
Background Processing |
Transactions are submitted to the Oracle interface tables and processed by the Inventory Transaction Manager in the background. This option is suitable for large volumes of transactions and allows the upload to complete without waiting for Oracle to finish processing each record |
Note: When using Background Processing, transactions will appear in the interface tables before Oracle processes them. You can use the Interface Transactions download source to monitor the status of these records after uploading.
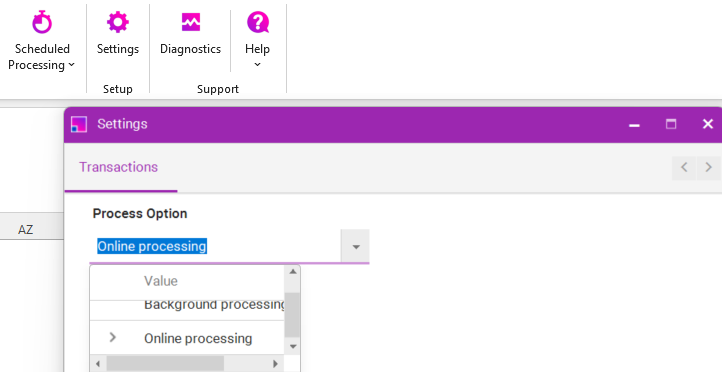
Step 3: Save and Generate the Sheet Layout
Once your Process Option is selected, click Save to store your settings. Then follow the steps below to generate the Inventory Transactions sheet layout based on those saved values:
-
In the More4apps ribbon, click Templates and then select Create New Sheet.
-
From the list of integrators, select Inventory Transactions and click Select.
-
A new Inventory Transactions sheet will be created in your workbook. The column layout of this sheet is determined by the settings you saved in the previous step and reflects the Process Option selected.
Note: If you need to change your Process Option after the sheet has been created, return to the Settings Form, update the value, click Save, and then regenerate the sheet using Templates > Create New Sheet. Your existing sheet will need to be replaced to reflect the updated settings.