Protecting Your Worksheet
The Add-in supports Excel’s built-in worksheet protection. This allows you to restrict users from making changes to your templates.
This process when paired with the Disable Creating and Editing Sheets Profile Option ensures a full locked down of your templates so users can only use what has been provided to them.
Follow the steps below to lock down your worksheet while leaving the rest open for data entry.
Step 1 – Prepare Worksheet for Locking
Unlocking first ensures that all cells have the correct protection at the end. Otherwise some areas of the sheet could be missed.
-
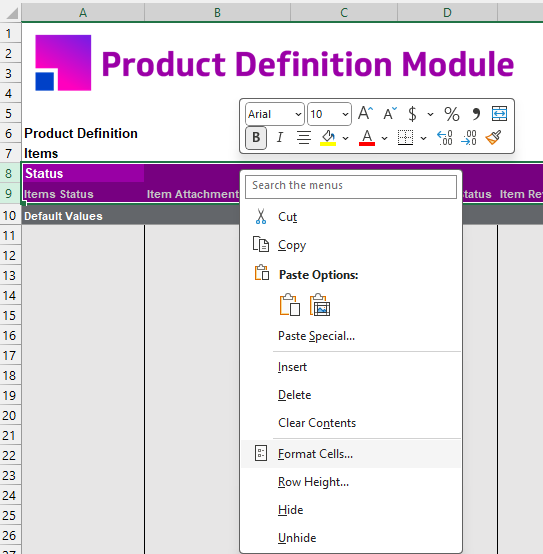
Select your worksheet.
-
Press
Ctrl + Ato select the entire sheet. -
Right-click anywhere in the selection and choose Format Cells.
-
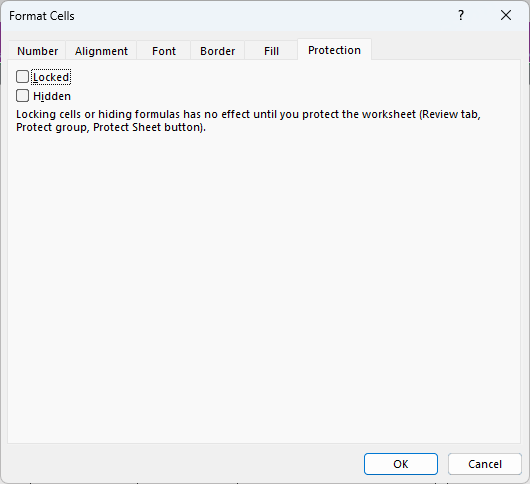
Go to the Protection tab.
-
Make sure Locked is completely unchecked (box should be blank).
-
Click OK.
Step 2 – Lock Critical Rows
This step will lock the specific parts of the sheet that should not be touched by the user.
-
Select rows 8-9.
-
Right-click and choose Format Cells.
-
Go to the Protection tab.
-
Check the box for Locked.
-
Click OK.
Step 3 – Turn on Protection
The final step, that locks the worksheet and sets the password.
-
Go to the Review tab in Excel.
-
Click Protect Sheet.
-
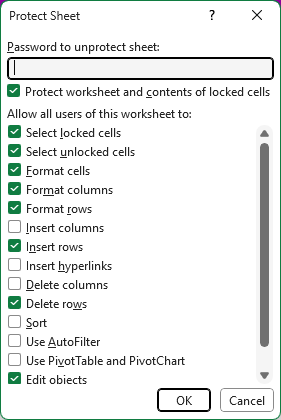
Enter a password of your choice.
Keep this password safe. More4apps cannot recover lost worksheet protection passwords. -
Check the check boxes indicated in the image below.
-
Click OK.
-
Save Your Workbook
Worksheet protection is now complete and can be distributed as needed. For users, they can use the 'Copy Active Sheet' ribbon option to keep making new copies of these sheets if required, this will still retain the protection.