Manually Creating Profile Options
Profile Options can be created manually if required, although we recommend using the Admin Utility to import profile options, it reduces setup time and removes any risk of incorrectly configured profile options.
To create profile options manually refer to the steps below. The required values can be found in the corresponding product user guide 'Getting Started' section.
Determine Your Profile Details
Each More4apps Module user guide includes sections describing the Profile Options for that module and their setup details. Use the table below to locate the correct sections for profile details.
| Profile Type | Purpose | Where to find details |
|---|---|---|
Restrict Access To Integrators |
Prevent users from accessing specified Integrators within a Module |
See the 'Getting Started' > 'Restriction of Integrators' section of the Module user guide. |
Enabling BI Report Downloads |
Enabled download functionality for Integrators where they use a BI Report Download |
See the 'Getting Started' > 'Enabling BI Report Downloads' section of the Module user guide. |
Disable Creating and Editing Sheets |
Restricts users from Creating and Editing existing templates |
Profile Creation
-
Navigate to Setup and Maintenance from the Oracle Homepage.
-
Click the Search option under the
 icon and select the Manage Profile Options task.
 -
Click the + under the Profile Options section.
-
Enter the details for the profile you are creating. Refer to the above section to determine what profile values you require.
-
Click Save and Close
-
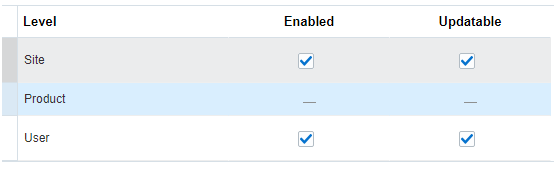
In the Profile Option Levels section, select the checkboxes for the levels you want to enable (Site and/or User). Make sure both Enabled and Updatable are checked for the levels you require.
-
Click Save and Close.
| Profile Options must be assigned to users in order for them to take effect. See Setting Profile Values on how to set your profile options. |