Create Supplier Records
Before you begin, please review the current Suppliers Limitations. We expect that these will be resolved over time as Oracle improves the underlying web services allowing us to add functionality to this product.
The Oracle REST web services are designed to default certain information during the upload process. To preserve performance, this Integrator has been designed to allow the background REST web service to create such default values rather than leaving this to the Oracle ERP Cloud UI.
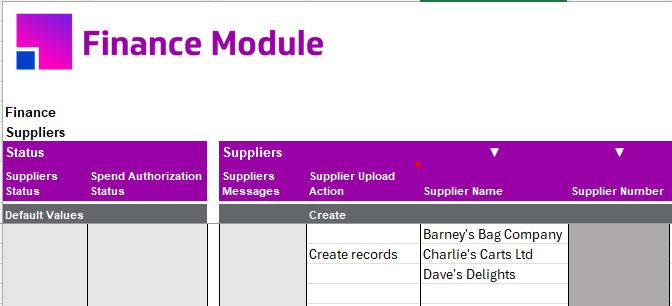
To create new Supplier master data records, ensure the Upload Action for all relevant sections is set to Create. Alternatively the action Create records can be entered: this will upload all data contained in the sections to the right of this entry without having to enter an Upload Action value in each subsequent section.
| Use the Default Values row (row 10) and set the value to Create for each section to be uploaded if you only want to upload a subsection of the data in the sheet. Alternatively, simply enter Create records (case sensitive) into the ‘Supplier Upload Action’ Default Values row to automatically set the Upload Action in the Supplier and all subsequent sections containing data for all rows present. |
Sheet Structure Examples
Like all other More4apps EBS Wizards and Fusion Integrators, the worksheet sections are related to each other in a hierarchical manner. The following table demonstrates the sections’ relationships.
| Section | Parent Section | Relationship |
|---|---|---|
Suppliers |
Each row in the Supplier section is a separate Supplier record |
|
Supplier Attachments |
Suppliers |
Many to One |
Addresses |
Suppliers |
Many to One |
Sites |
Suppliers |
Many to One |
Supplier Contacts |
Suppliers |
Many to One |
Contact Addresses |
Supplier Contacts |
Many to One |
Third-Party Payment Relationships |
Sites |
Many to One |
Site Assignments |
Sites |
Many to One |
Site Attachments |
Sites |
Many to One |
Products & Services |
Suppliers |
Many to One |
Business Classifications |
Suppliers |
Many to One |
Spend Authorization |
Suppliers |
One to One |
The scenarios below illustrate the hierarchical layout. Examples do not include all critical columns. Note the ‘Create’ action in each section.
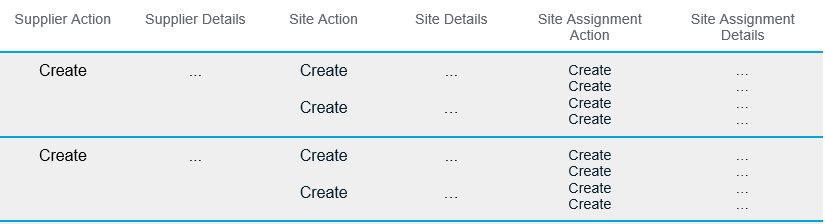
Scenario 1
Two Suppliers each with two Sites with two Site Assignments:
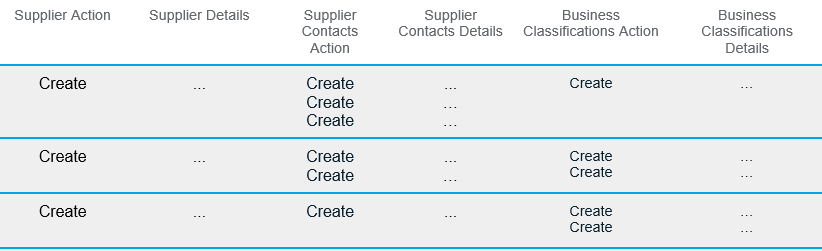
Scenario 2
Three Supplier records.
-
the first has three Contacts and one Business Classification.
-
the second has two Contacts and two Business Classifications.
-
the third has one Contact and two Business Classifications:
Once all Supplier information is entered, the upload process can be initiated. For details on uploading refer to the Upload section.
Successful uploads will return ‘Accepted’ statuses and some response information from the web service.
Rejected uploads will return messaging.
More information on how to reprocess these records is here.
Attachments
The Integrator is only able to create Attachments as the Oracle web services does not currently allow for the update or download of existing Attachments.
Refer to the attachments documentation for more information on these limitations
Descriptive Flexfields
In the DFF form, the field controls may not represent the Data Type of each DFF Attribute for the chosen Context. They will be presented as shortlist LOVs as shown below:
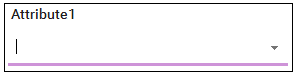
For DFF Attributes with a Data Type of Free Text, a user can type the required value into the available field.
Please refer to the Descriptive Flexfields documentation for more information.
Assigning Sites to New Addresses
To associate a Site with a new Address being created in the same upload, ensure the 'Site Address Name' has the same value as the 'Address Name' in the 'Addresses' section. It may be simpler to use a simple Excel formula in the ‘Site Address Name’ field that references the ‘Address Name’ value on the same row.

Assigning Sites to Existing Addresses
This functionality is useful when creating new Supplier Sites referencing existing addresses instead of creating duplicate addresses in your instance. Examples of this could be when address records have been created and not yet assigned to Supplier Sites, or new Supplier Sites for additional business units are being created.
To associate a Site with an Address that already exists in the database, populate the 'Site Address Reference' field with the existing address name. Use the LOV on this field in the Data Form to help locate the address record if required. During validation the Integrator will automatically populate the 'Site Address Name' value in preparation for upload.

Assigning Addresses to Contacts
The ‘Contact Addresses’ section of the Supplier Integrator has 3 columns plus the read-only ‘Messages’ column.
Those columns and their usages are as follows:
-
Contact Addresses Upload Action: this can only be ‘Create’ or ‘Create records’.
-
Contact Address Reference: this is used for assigning an already existing Address to the Contact.
-
Contact Address Name: this is used to assign an address being created in the same upload as it is being assigned.
The Contact Address is always downloaded into the ‘Contact Address Name’ column.
Note that, if you have assigned an Address Name to a Contact and that Address Name is subsequently updated, the Address Name assigned to the Contact will be automatically updated.
If you should wish to add an existing Address record to the Contact, select the appropriate Address Name in the ‘Contact Address Reference’ column and upload the record.
| You cannot currently delete a ‘Contact Address Name’ via the Integrator. |